Quality solar, battery, and energy systems
designed for the Thompson Okanagan.
Built with care. Installed with integrity.
Engineered to deliver clean power for
decades.
If you’ve been researching how to install solar panels, you’ve likely discovered that every property is unique. The process isn’t just about placing panels on a roof — it’s about designing a system that’s built to last, perform efficiently, and deliver consistent energy savings over time.
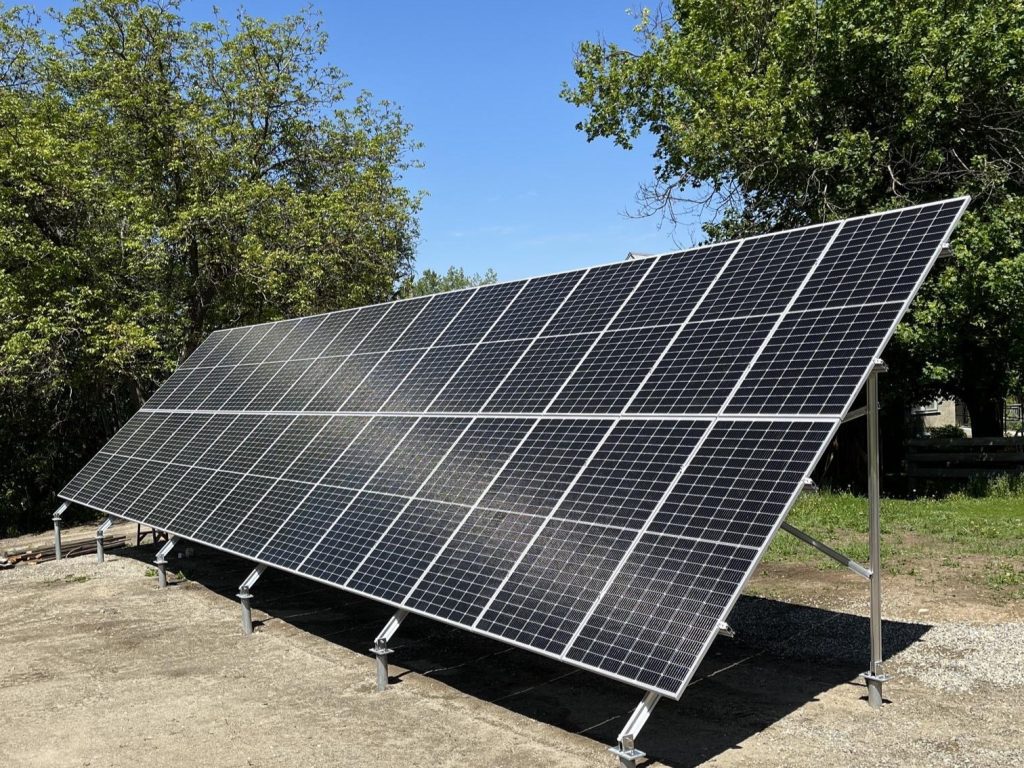
At Roost Solar, we specialize in custom installations across Vernon and the Thompson-Okanagan. Every project begins with a detailed solar potential assessment. This helps us understand how your home interacts with the sun throughout the year so we can design a system that fits your roof, your energy goals, and your long-term return on investment.
Before we talk about how to install solar panels, we start with a detailed on-site or remote evaluation. This involves analyzing your roof orientation, pitch, and shading from nearby trees or buildings. These factors determine how much sunlight your panels will capture and what your annual production potential looks like.
We use specialized software to simulate sunlight exposure over the seasons. By modeling your property’s energy profile, we can predict your estimated kilowatt-hour output. For homeowners across the Okanagan solar region, this helps visualize how solar will perform in both summer’s long daylight hours and winter’s shorter days.
Once we understand your site’s solar potential, we calculate the right system size based on your electricity use. It’s important to remember that sizing isn’t just about the roof space — it’s about balancing production with consumption.
We look at your hydro bills, evaluate your household’s average monthly kilowatt-hour usage, and factor in future needs, like electric vehicle charging or home expansion.
In many Okanagan solar installations, we aim to offset 80% to 100% of annual electricity usage. BC Hydro’s Self-Generation program allows customers to send excess energy back to the grid, creating credits that offset future bills. This balance ensures optimal system performance without oversizing your array unnecessarily.
A big part of how to install solar panels the right way is choosing the right components. At Roost Solar, we use premium materials designed for durability, efficiency, and longevity.
Panels and Inverters:
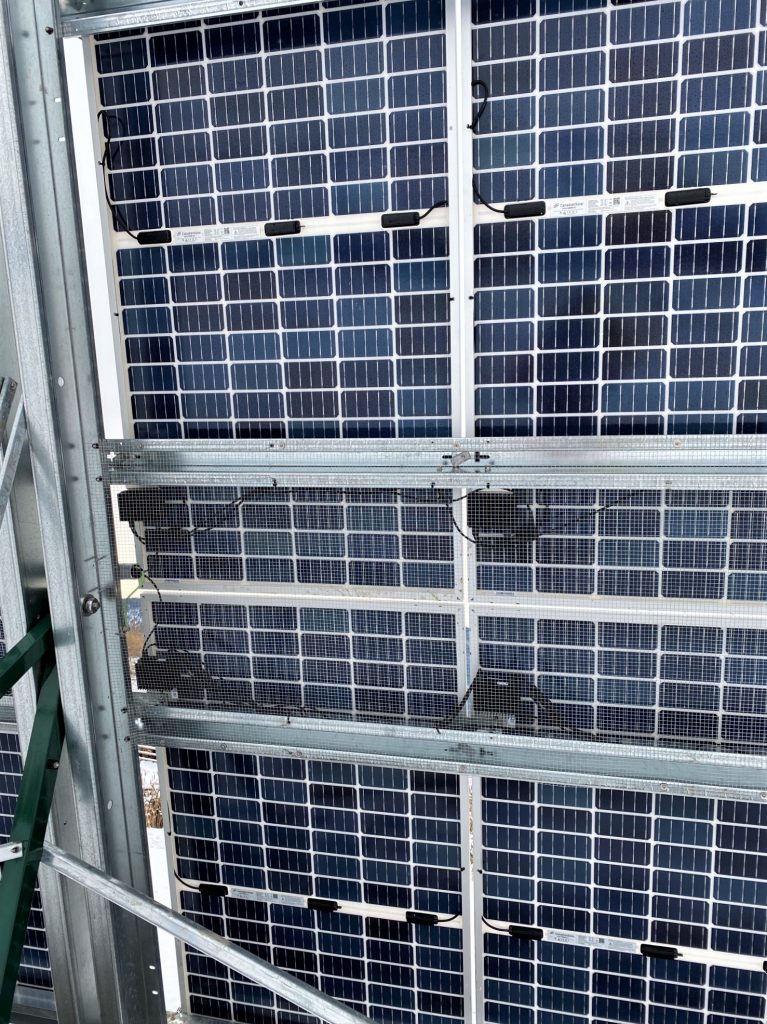
We install tier-one solar panels known for high performance and strong warranties. These panels convert sunlight into DC power, which is then transformed into usable AC electricity through inverters.
Mounting Systems:
In the Okanagan, roofs vary widely — from clay tiles and standing seam metal to asphalt shingles. That’s why we use proven racking systems like Kinetic, Pegasus, and S-5.
These mounting systems are tested for high winds, snow loads, and extreme temperatures — all conditions that Okanagan solar systems face year after year.
Understanding how to install solar panels safely means knowing how to integrate them with your home’s existing electrical system. We are a Licensed Electrical Contractor and Eevery Roost Solar project is overseen by a Journeyperson Electrician. All of our systems are designed and installed according to BC electrical code and Technical Safety BC requirements.
Our designs includes proper wire sizing, conduit runs, breakers, and protective disconnects. This ensures the electricity produced by your panels flows smoothly into your home and back to the grid when production exceeds your usage.
For grid-tied installations, we also coordinate with BC Hydro for interconnection approvals. The process is seamless for the homeowner.
Installing solar panels correctly means combining precision craftsmanship with strict safety standards.
Each panel is mounted using a racking system selected specifically for your roof type. Wiring is routed neatly to the inverter and main electrical panel. After the system is installed, we perform a full inspection, confirm power output, and test safety mechanisms like the rapid shutdown feature and anti-islanding function.
Once testing is complete, we submit documentation to BC Hydro for final interconnection approval. Within a few weeks, you’re ready to start generating your own clean power.
Once you’ve learned how to install solar panels, you’ll realize that proper monitoring is what keeps your system performing for years to come. Roost Solar installs systems that can be tracked in real-time through mobile and web dashboards.
Monitoring allows you to see how much energy your panels are producing, track system efficiency, and spot potential issues early. For Okanagan solar systems, where weather conditions can vary widely, monitoring ensures consistent long-term results and peace of mind.
Roost Solar also provides ongoing support long after installation — from technical troubleshooting to maintenance checks. It’s all part of our commitment to helping homeowners enjoy clean energy without the worry.

5101 25th Ave, Vernon, BC


